Saturday, March 16, 2013
Gluten Free All Purpose Bread
In light of my experiments with gluten free products, I decided it was time to try my hand at making a loaf of bread. Since I have been traditionally trained, I have trouble foreseeing how gluten free breads will turn out. My initial experiment was to be quite honest, a moderate disaster. Not to say that it didn't taste good, it actually had a nice flavour, but it was also extremely dense and really didn't really rise very much.
My inital idea was to see how it would turn out if I used a basic bread recipe, but replaced the A.P. flour for gluten free flours and some guar gum.
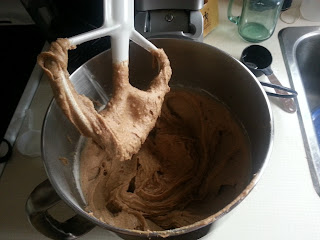
As you can see, the dough started out fairly promising, it did rise about 50% which isn't too bad.
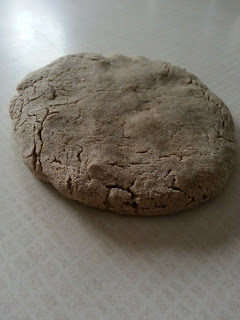
Unfortunately, after forming them into buns, they didn't really rise again. After putting them into the oven to bake, they again, do not rise and you are left with something pretty much the same as what you put in.
So here we go, gluten free hockey pucks. Lets just say I won't be doing that again. Afterwards I did some research and same across another recipe that looked interesting. I wasn't sure how it would work out, but what did I have to lose. The original recipe is from Gluten Free Real Food. I changed it a bit, since that seems to be what I always do and it turned out quite well. There were a few significant differences in the products, but amazingly it turned out perfectly!
The Recipe
Ingredients
Wet Ingredients
3 large eggs
1 Teaspoon apple cider vinegar
1/4 Cup oil Coconut Oil
1 1/3 Cup milk – unsweetened (rice, hemp, almond) warmed to about 30-40C
20ml Maple Syrup
3 Tablespoon Coconut Palm Sugar
1 1/2 Teaspoons Salt
Dry Ingredients
1/2 Cup Sorghum
1/2 Cup Amaranth
1 Cup Teff Flour
1 Cup Cornstarch
1 Tablespoon Guar Gum
1 Tablespoon Dry Active Yeast
2 tbsp Chia Seeds
*1/4 seeds or nuts (optional)
Directions
1. In a large bowl, combine all of the wet ingredients and mix well.
2. In a separate bowl, combine all of the dry ingredients and mix well.
3. Pour the dry ingredient mixture into the wet ingredients and mix well. The mixture is going to be wet, pretty much like when you're making banana bread or zucchini bread.
4. Pour the dough into an oiled loaf pan with 3" walls and let it rise for 40-45 minutes in a warm moist place. I put mine in the top shelf of the oven on the lowest possible setting then occasionally sprayed water onto my pizza stone on the bottom shelf.
5. Once it has risen, pull the bread out and turn the heat up to 350F. Put the bread back in once the oven has reached the right temperature and bake it for 40-50 minutes. I put a digital thermometer in mine and had an internal temperature between 160 and 170F.
6. Let the bread cool for 5min on the counter, then take it out of the pan and let it cool on a wire rack.
Side Notes
1. The bread itself is actually quite sweet. You don't need to add all of the sugar unless you want it sweet.
2. You can add around 1/4 Cup of some extras like seeds or nuts. I put hemp hearts in mine since I like the added nutrition.
3. The reason why we add so much cornstarch is mainly to add structure to the bread. For anyone who has made a slurry to thicken a soup or sauce, you will know that cornstarch is great for thickening products. Lets be straight up though, cornstarch is a starch, and there for has amylose 20-25% and amylopectin B 70-75%, both of which are just complex glucose structures. Although they are gluten free, they do increase your blood sugar. Fortunately Amylopectin B is better for you than the Amylopectin A you get from wheat flour.
One of things I learned from making this is that gluten free breads are pretty fragile and can't withstand the normal rise, punch down, form, rise, bake procedures of normal bakery breads. It is advantageous to have a single rise then bake. I think it's also a good idea to think of these as having the texture and consistency of quick breads, even though they are in fact a yeast bread.
Subscribe to:
Post Comments (Atom)


I thought you weren't eating eggs anymore...?
ReplyDeleteOh we still do. Just not very often.
ReplyDelete